Azure Migrate Sync Document
Version 1.0
Table of Contents
- INTRODUCTION
- PURPOSE
- INTENDED USE AND TARGET AUDIENCE
- Getting started with CloudRecon
- Azure Migrate Sync on CloudRecon Portal
- Sync Discovery Data
INTRODUCTION
PURPOSE
This document is to demonstrate the Azure Migrate Sync feature of the CloudRecon Portal in 2023. Customers will be able to use this document as a guide to utilize the variety of features offered by CloudRecon.
INTENDED USE AND TARGET AUDIENCE
This document is to be used as a reference with target audience which includes company internal personnel, customers, and partners.
Azure Migrate Sync
Azure Migrate Sync enables the replication of on-premises servers to Azure for migration purposes. It allows organizations to synchronize on-premises virtual machines (VMs) to Azure, so that they can be assessed for migration and then moved to Azure with minimal downtime.
Getting started with CloudRecon
To get started using the CloudRecon Portal, you must first have a subscription of the same.
Once you have a subscription, you can start using the infrastructure assessment tool by following these steps:
- Go to the CloudRecon Portal, visit the following link:
https://cloudrecon.cloudatlasinc.com/Home.aspx - Click on the “Login” button on the top-right side of the page.
- Sign-in with your Work or School Account, or your CloudRecon ID provided to you along with your subscription.
NOTE: If you sign in with your Microsoft ID, you get access to a third subscription option for Azure Migrate Sync. - Enter your CloudRecon ID credentials.
- Once you are logged in, you will see the landing page of the CloudRecon portal. All IT Discovery tools that are compatible with CloudRecon, are listed on this page. Along with the names of the tools, the steps to utilize the tools for inventory discovery are also listed. Click on the “Got It” button on the bottom-right side of the page to proceed further.
- In the ‘View Dashboard’ page of the CloudRecon Portal, click on the “Azure Migrate” side-menu, as shown in Figure 5.
- In the side-menu, click on the “Sync Discovery Data” button, as shown in Figure 6.
- Select Option 1 – CloudRecon Azure Subscriptions and click on the “Save & move next” button, as shown in the figure below.
- Fill-in your subscription details and project details.
- Select Option 2 – CloudRecon Azure Subscriptions and click on the “Save & move next” button, as shown in the figure below.
- Fill the Azure Active Directory App Info, and click on “Save & Move Next,” as shown in the figure below.
- You will land on the Azure Migrate Sync Pre-Discovered Data page.
- Select Option 3 – Own Subscription with Office 365 Account and click on the “Save & move next” button, as shown in the figure below.
- Sync Assessment & Create Inventory
- Sync Complete Assessment
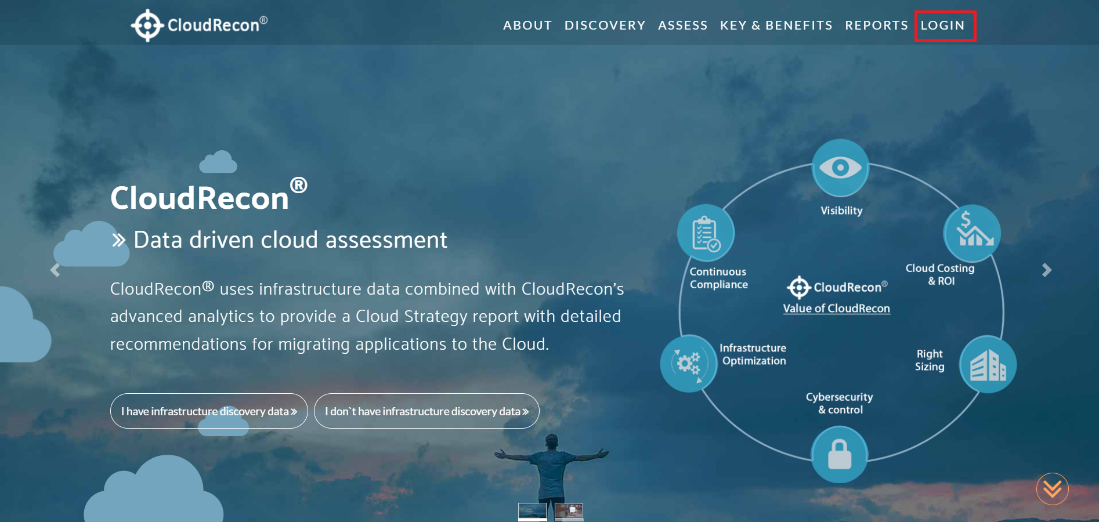
Figure 1: CloudRecon Portal Page
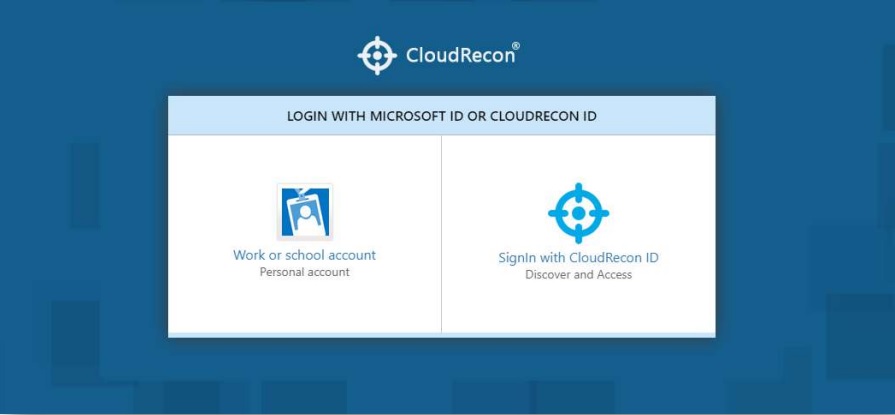
Figure 2: Log in with Microsoft or CloudRecon ID
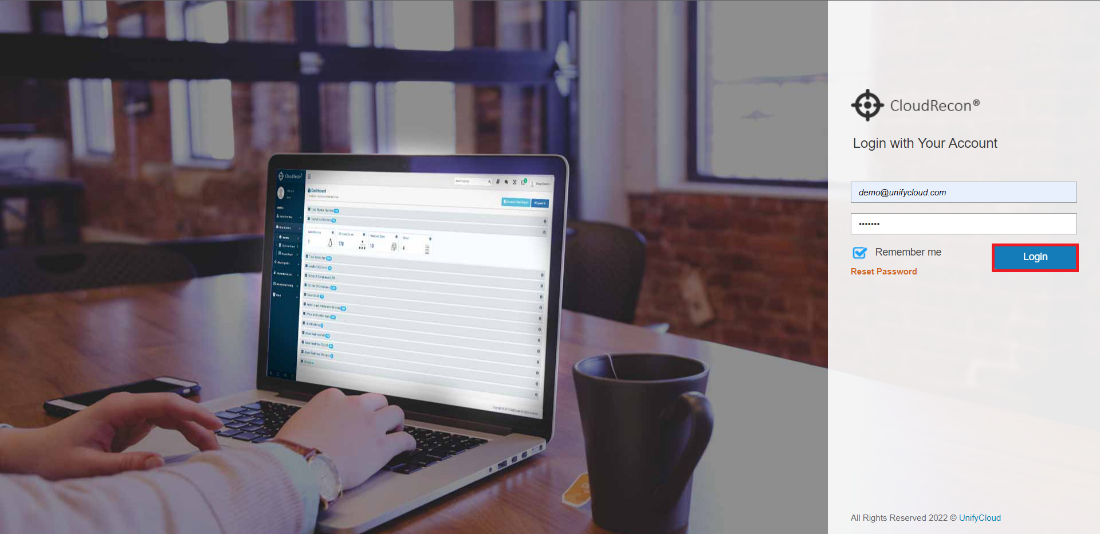
Figure 3: Log in with your CloudRecon ID
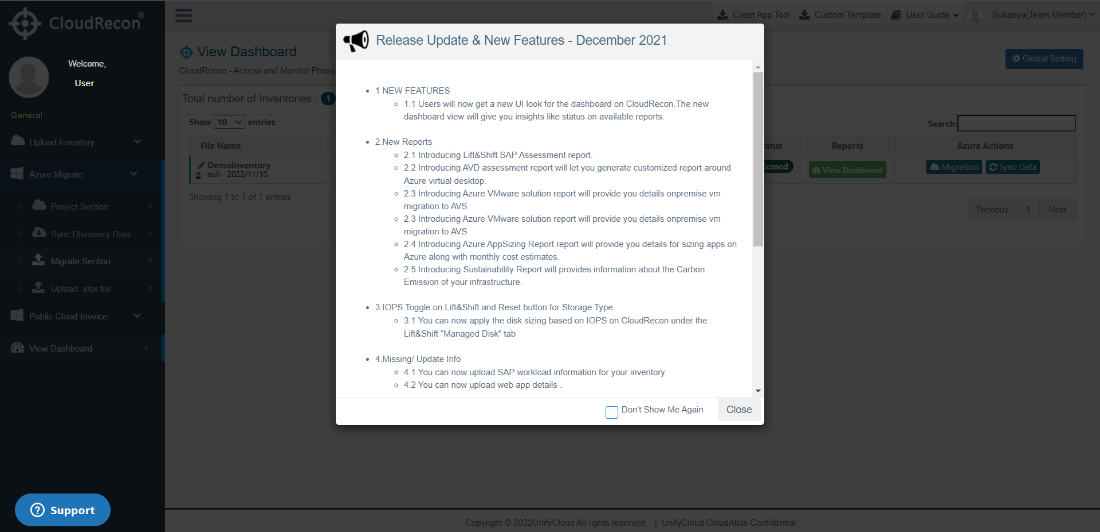
Figure 4: CloudRecon Home Page
Azure Migrate Sync on Cloudrecon Portal
To use the Azure Migrate Sync feature on the CloudRecon Portal, follow these steps:
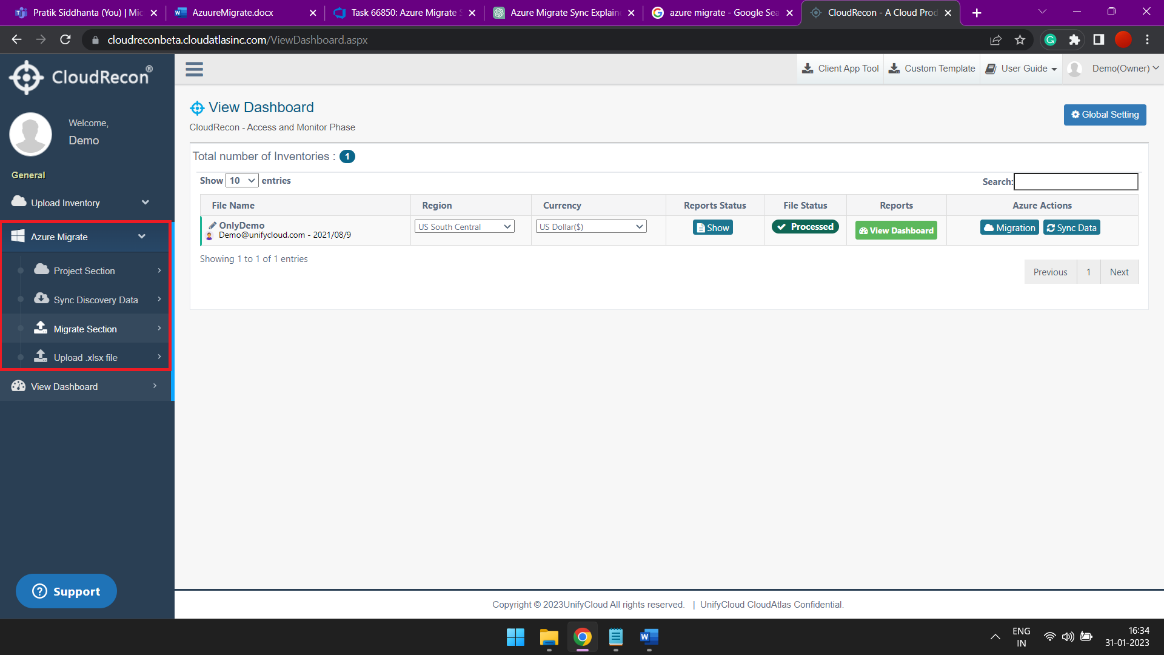
Figure 5: Azure Migrate Side Menu
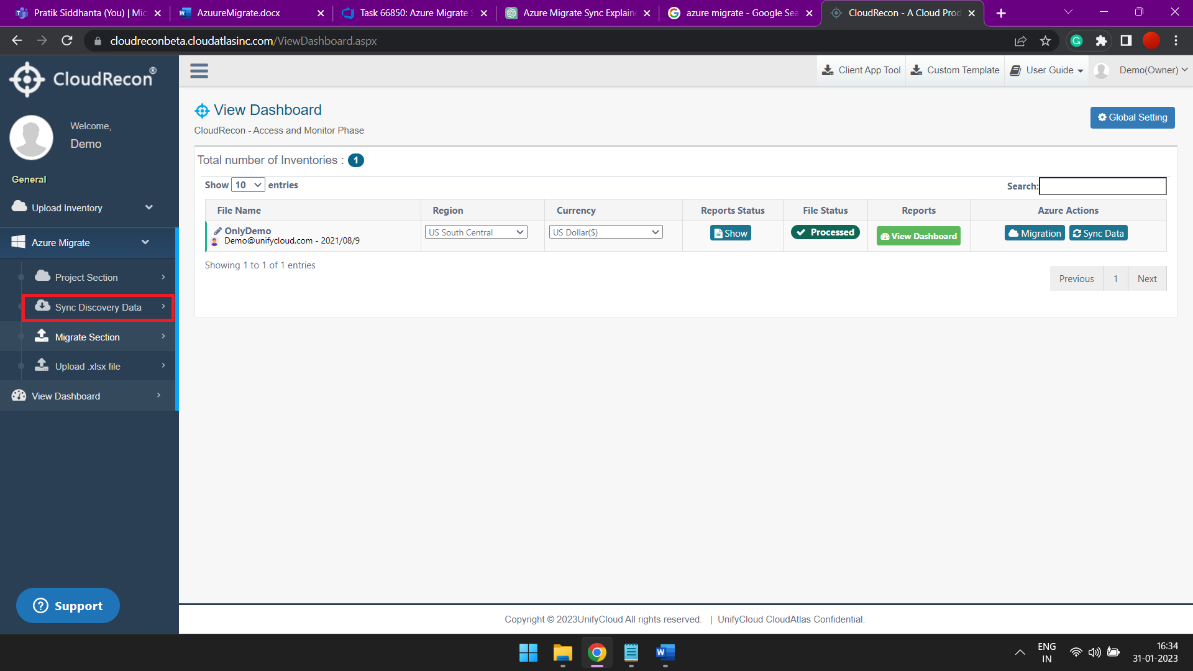
Figure 6: Sync Discovery Data
Option 1 - CloudRecon Azure Subscriptions
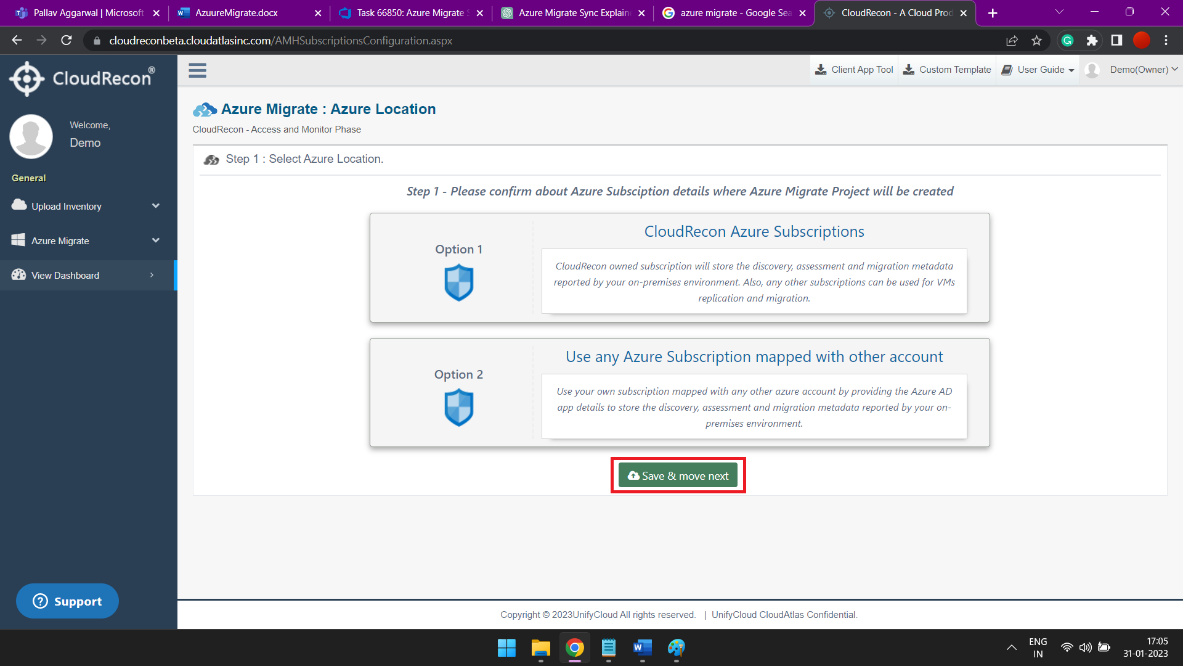
Figure 6: Select Azure Subscription Details

Figure 7: Sync Pre-Discovered Data to CloudRecon
Option 2 - CloudRecon Azure Subscriptions
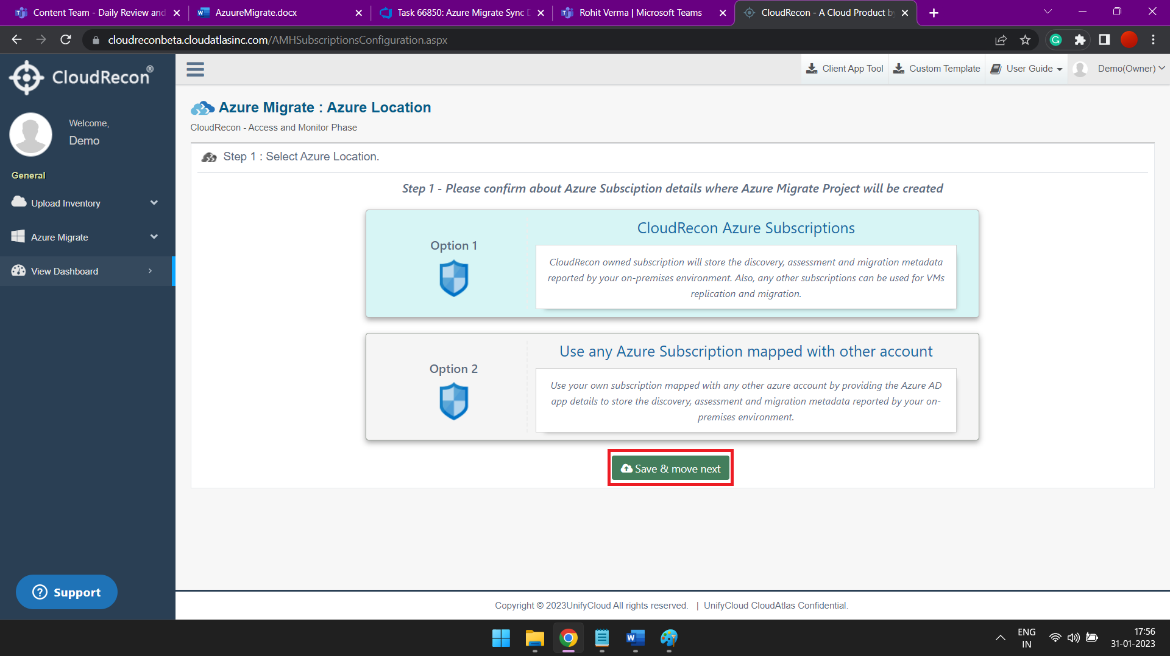
Figure 8: Select Azure Subscription Details
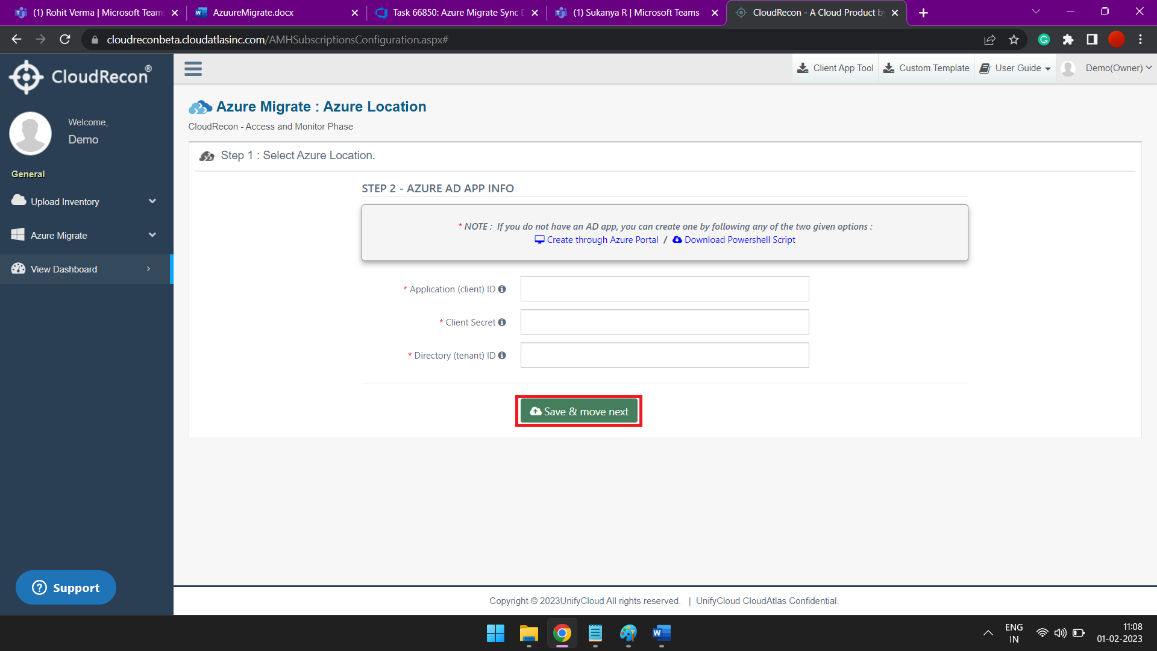
Figure 8: Azure AD App Info
Option 3 - CloudRecon Azure Subscriptions
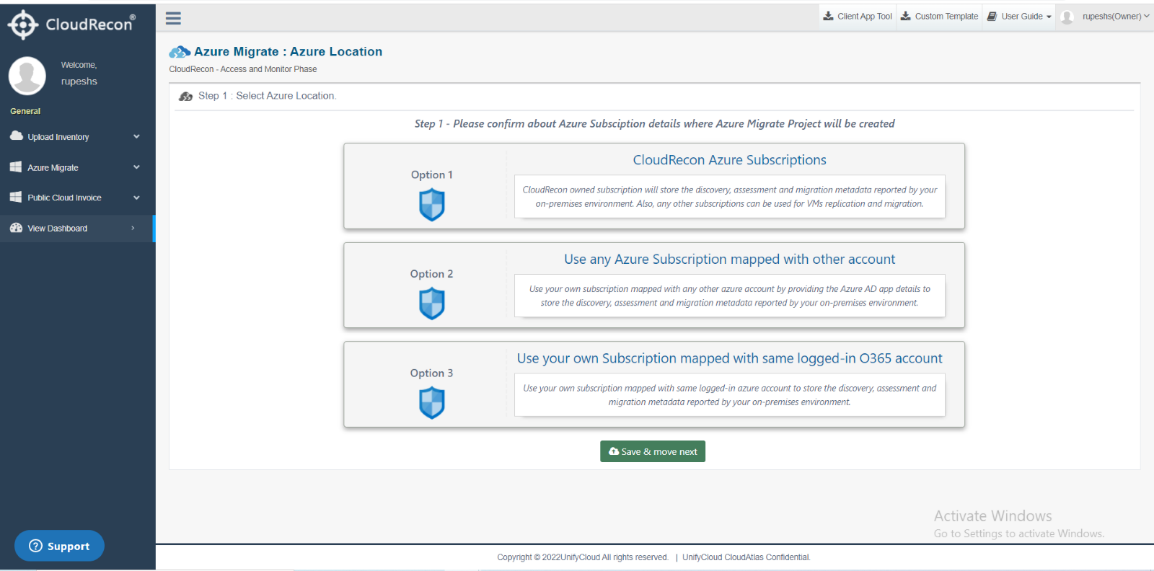
Figure 9: Select Azure Subscription Details
Sync Discovery Data
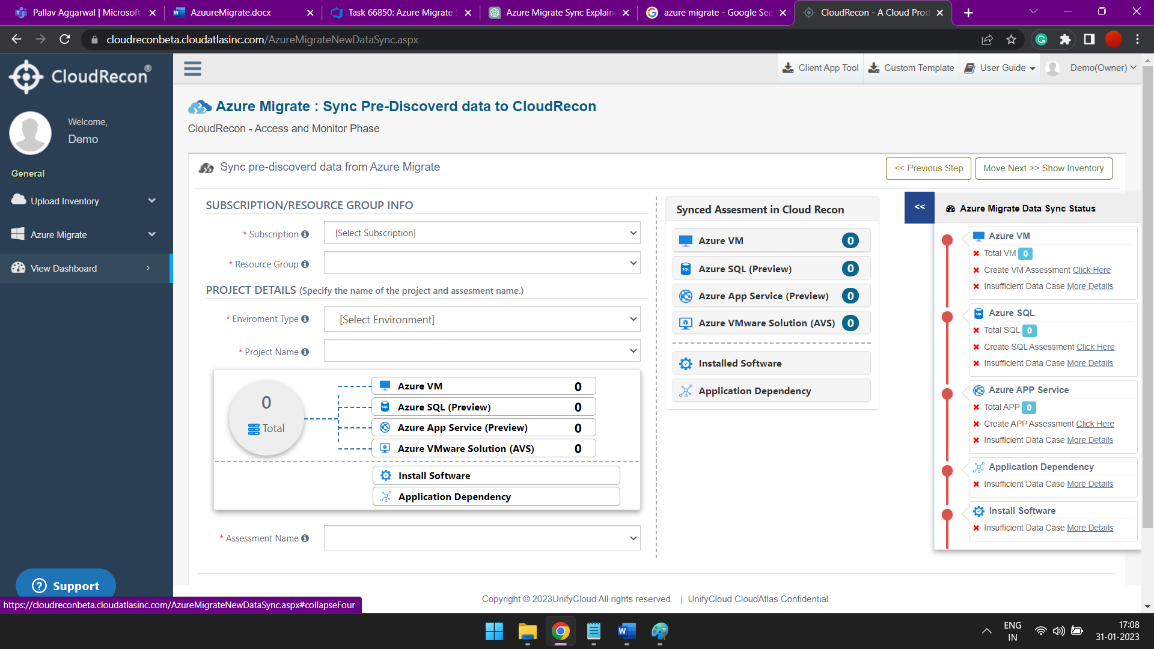
After selecting a subscription of preference, you can now synchronize your pre-discovered data to the CloudRecon portal.

Figure 10: Sync Discovery Data
Follow these steps to synchronize discovery data onto the CloudRecon portal.
Step 1: Select your Subscription and Resource Group.
Step 2: Select Your Environment (VMware / Hyper-V).
Step 3: Select Your Assessment Project Name
Now you can see your existing synchronized assessments in your Project section.
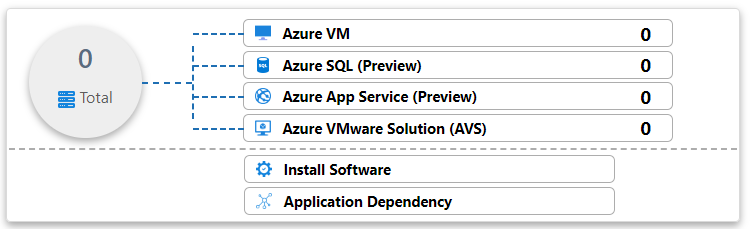
Figure 11: Synced Assessments Data
Once you’ve completed the steps mentioned above, you should be able to see two options for Synchronizing your data, as represented in the figure below.
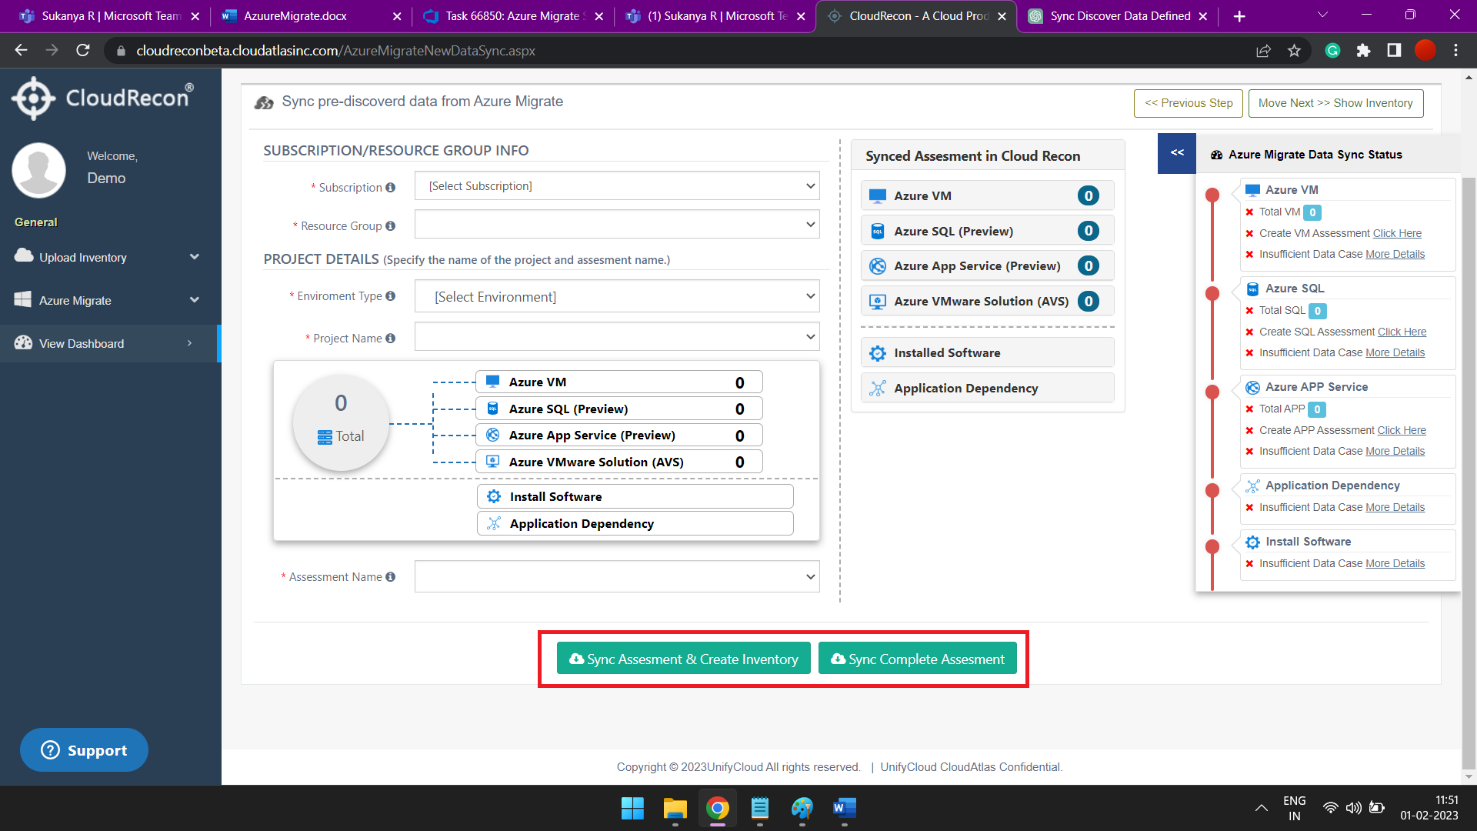
Figure 12: Sync Assessment
After successful synchronization, you can see your discovery data assessment name, as shown in the figure below.
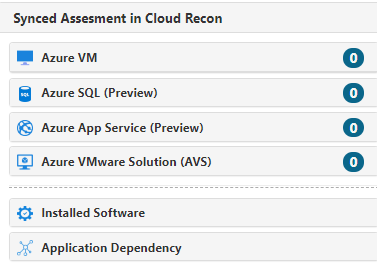
Figure 12 B: Synced Assessments in CloudRecon
You can also see a summary of the synced data, as well as the count of VMs, as shown in the figure below.
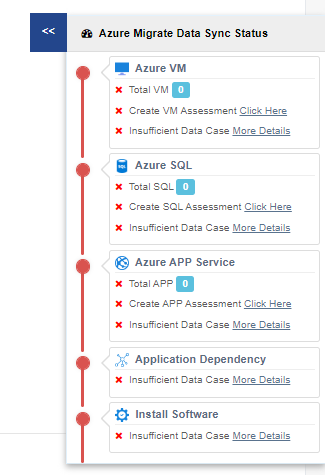
Figure 12 C: Azure Migrate Data Sync Status
Step 4: If you have selected “Sync Complete Assessment’, you will automatically be redirected to the Dashboard page. If you have selected “Sync Assessment and Create Inventory”, click on the “Move Next – Show Inventory” to view the synced data on the dashboard.
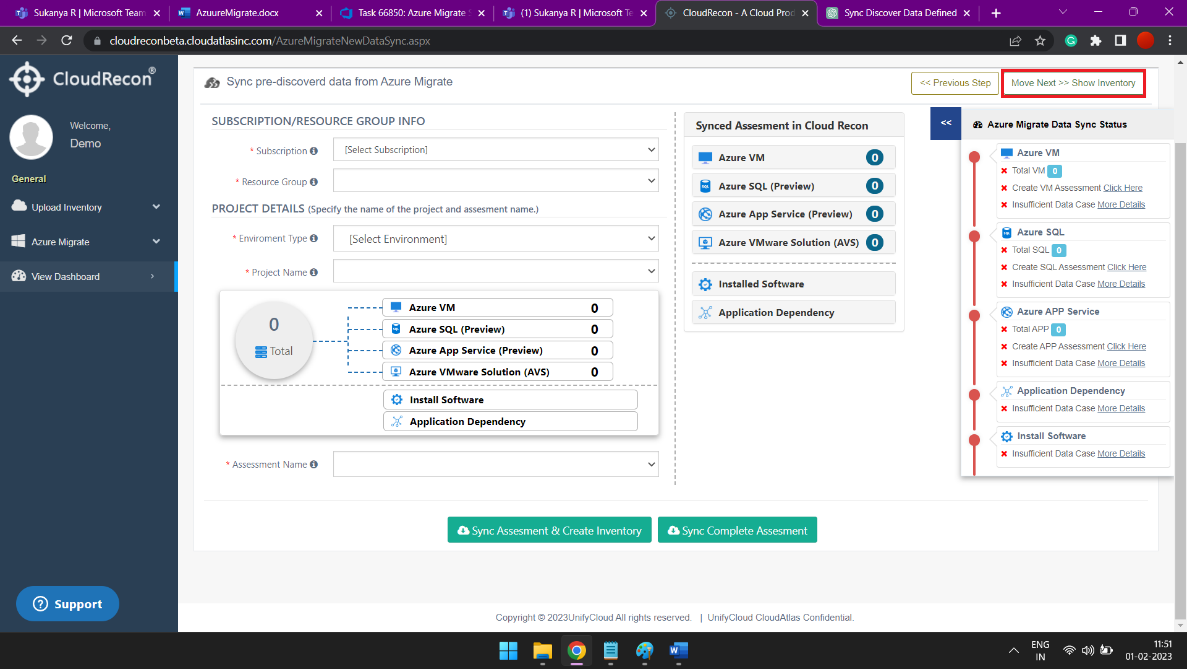
Figure 13: Show Inventory