This document outlines the new features that are being pushed on to CloudRecon Prod environment. Customers will be able to leverage these new features by taking this document as a guideline.
-
INTRODUCTION
This document is an outline of the new features that are being rolled out on CloudRecon portal in Feb 2021. Customers will be able to use this document as a guide to leverage the benefits of these new features.
This document is to be used as a reference with target audience which includes company internal personnel, customers, partners.
-
1. NEW FEATURES
-
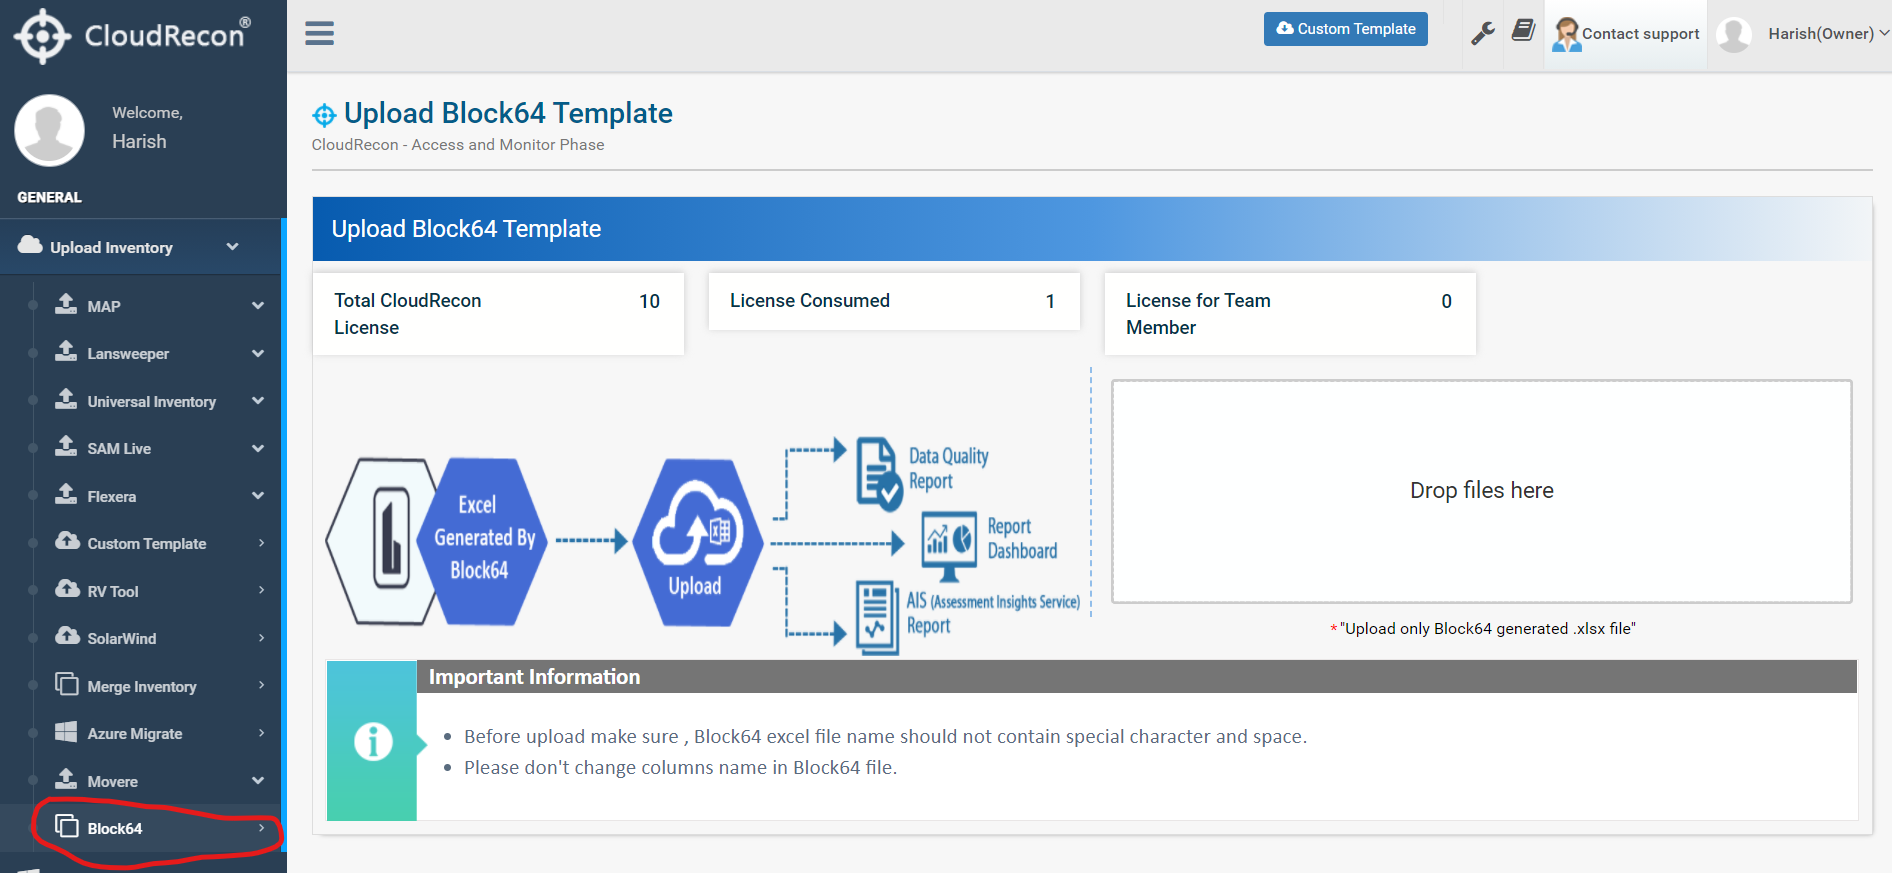
1.1 Upload Block64 Template
Upload your Block64 Template by navigating to the “Upload Inventory” section on the portal and click on “Block64” option at the bottom of the available list. Simply drop your template file to upload as inventory as shown in Fig 1: Block64 Template Upload.
Use Case: With this feature customers now have the option to upload their inventory if they have the Block64 template data for their on-prem inventory data.
-
1.2 Bulk Apply
-
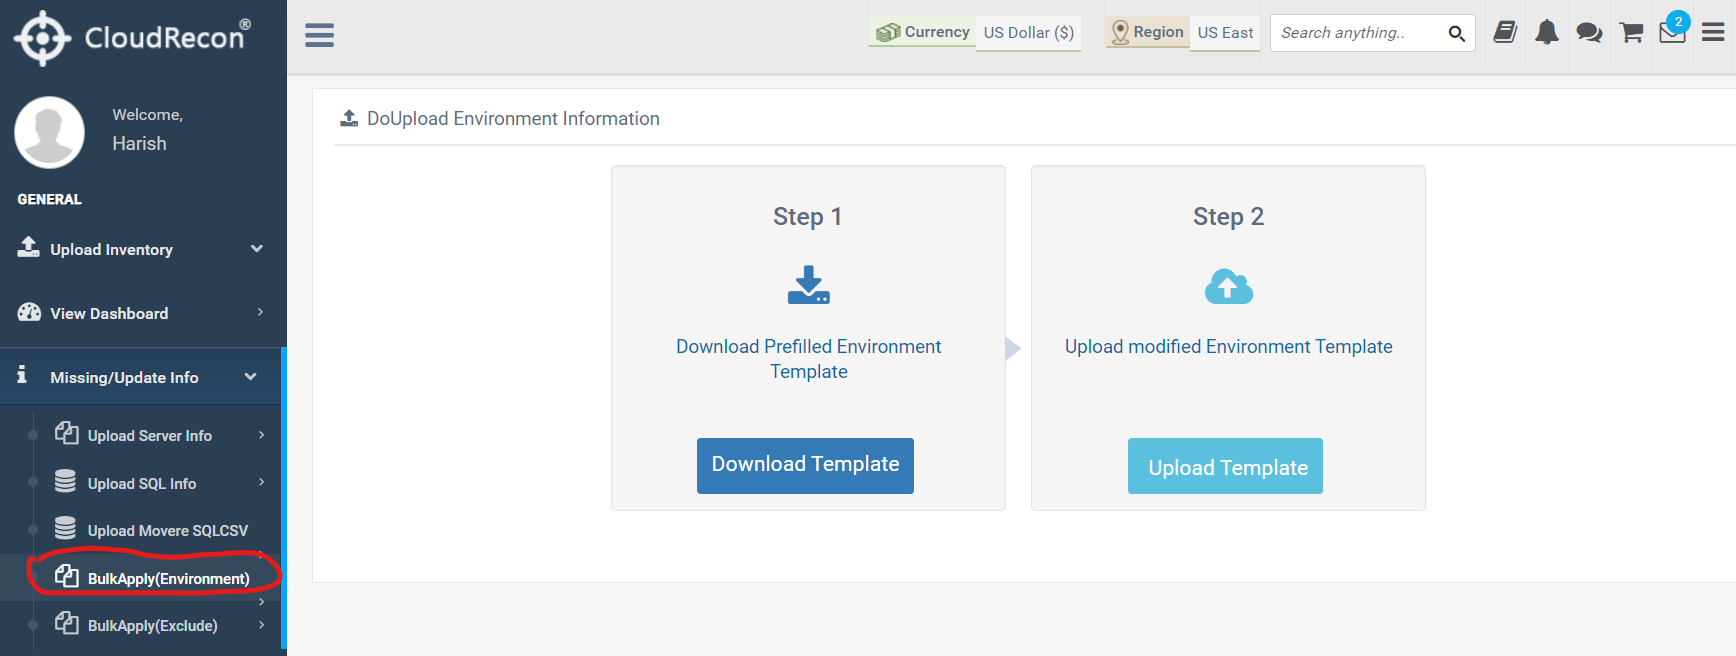
1.2.1 BulkApply(Environment)
You can now bulk upload your environment information in the inventory dashboard. Go to “Missing/Update Info” section and click on “BulkApply(Environment) option to go the said feature.
Use Case: With this feature customers can now simply upload a template with bulk changes via the template available, instead of doing the same manually from the report. You can follow the below steps as displayed in Fig 2: BulkApply(Env).
- • Step1: Download a prefilled environment template.
- • Step2: Upload the modified environment template after entering required details.
-
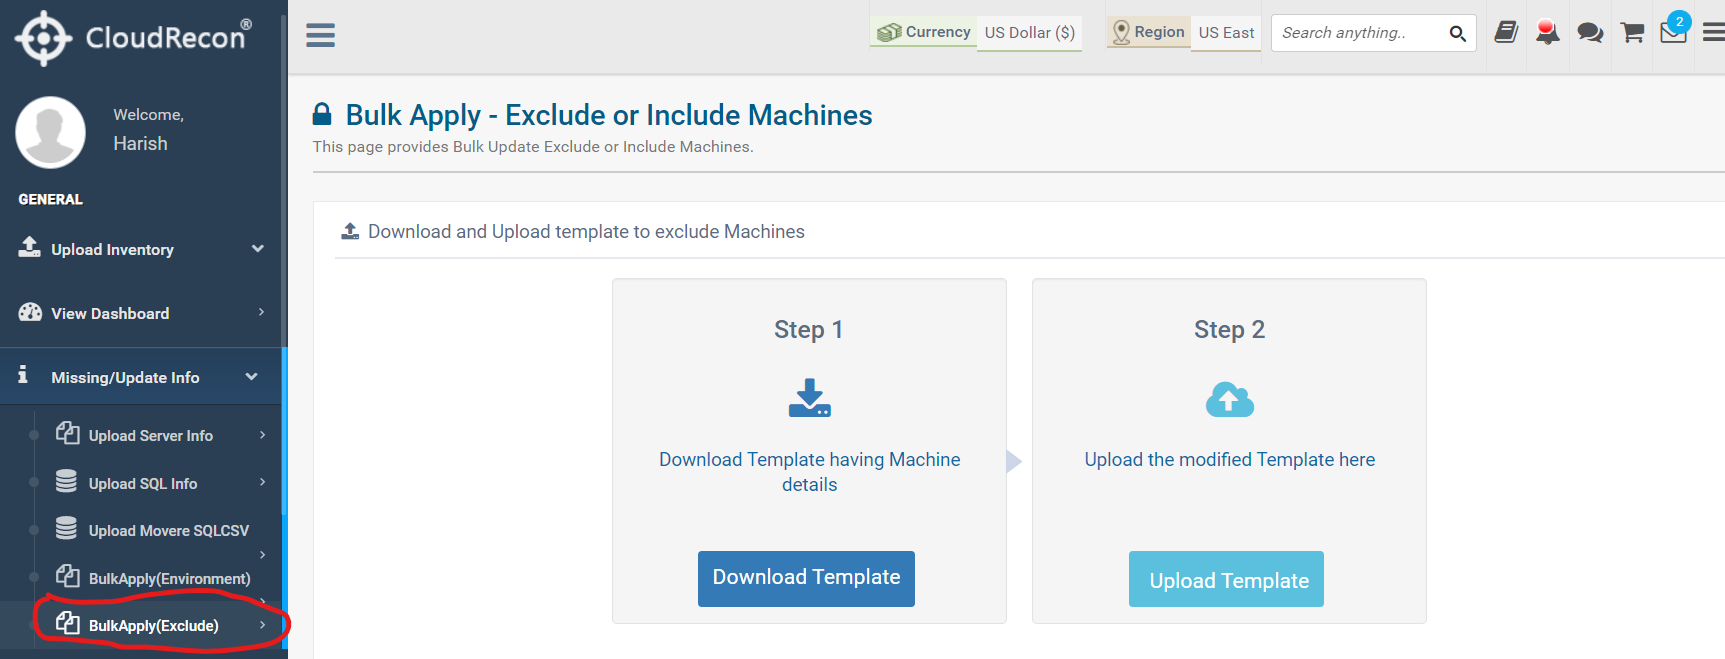
1.2.2 BulkApply(Exclude)
You can now bulk exclude or include machines by using this feature to manage your inventory machines that are being considered in the report. Click on “BulkApply(Exclude)” from the “Missing/Update Info” section on your dashboard to go to the feature.
Use Case: This feature will enable the customers to exclude or include the machines by directly editing the file with bulk details instead of doing the same manually from the report. You can follow the below steps as displayed in Fig 3: BulkApply(Exclude)
- • Step1: Download a prefilled template with machine details.
- • Step2: Upload the modified environment template after entering required machine details to include or exclude.
-
1.2.1 BulkApply(Environment)
-
1.3 Elastic Pool
-
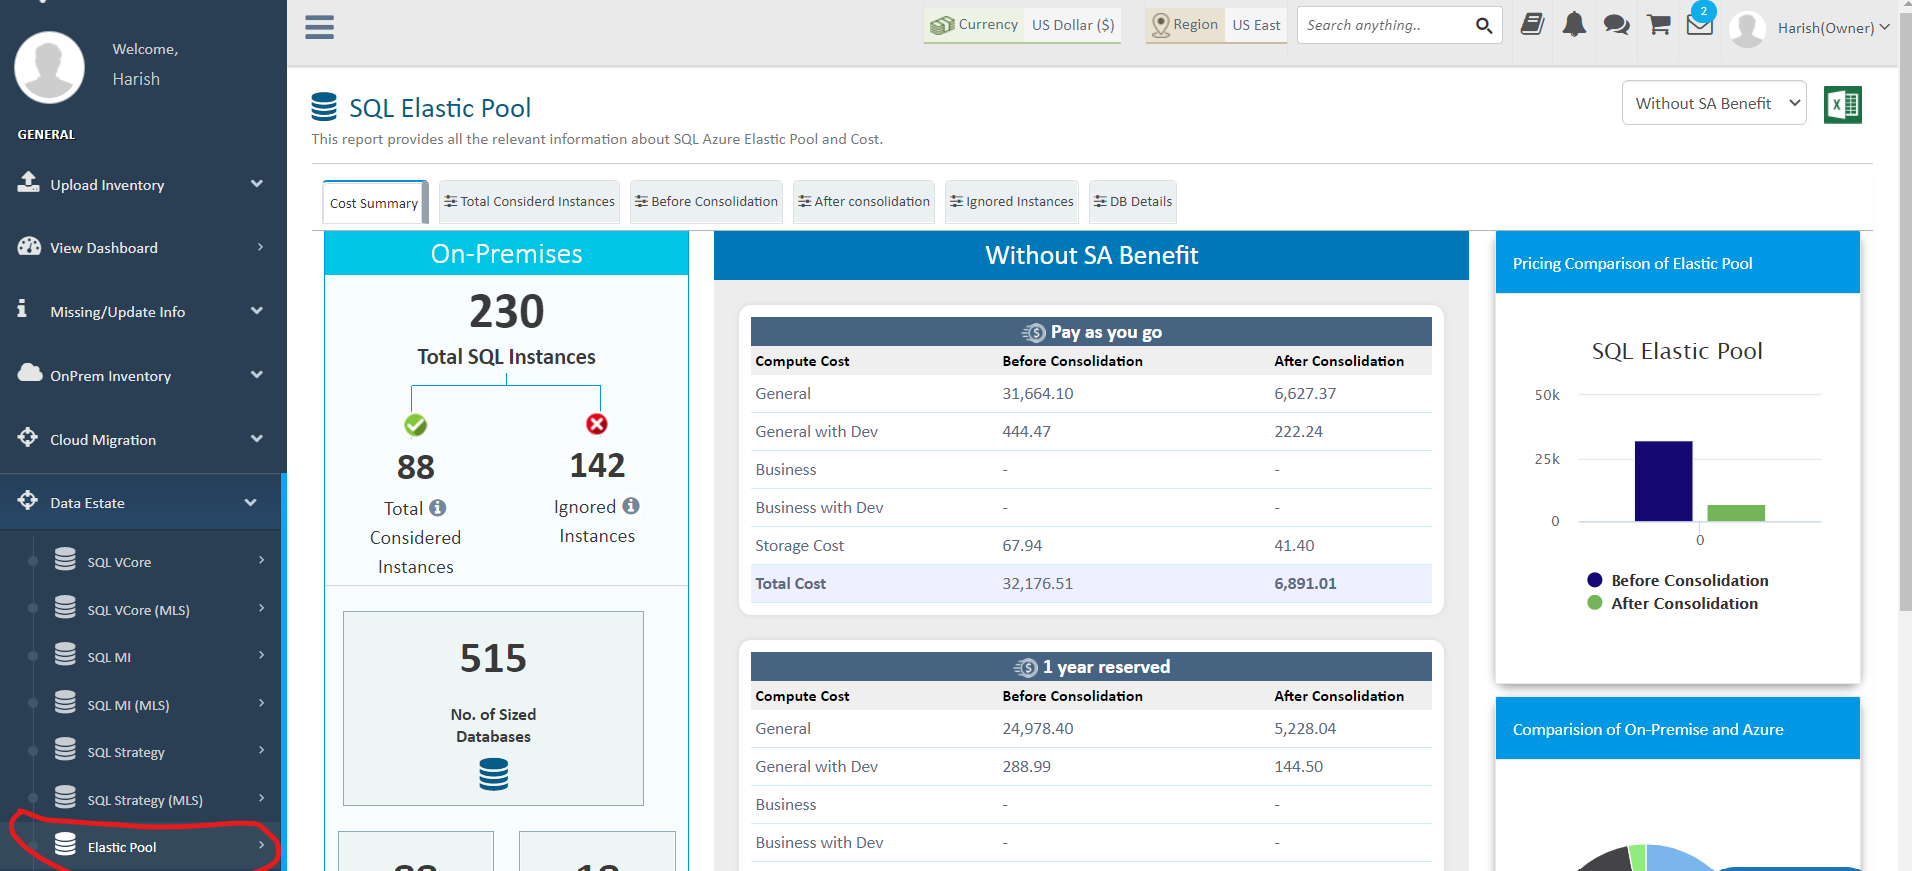
1.3.1 Elastic Pool Report
This is a new feature report we have introduced in “Data Estate” section of your dashboard. The Elastic Pool Report will provide all the relevant information about SQL Azure Elastic Pool and Cost analysis around the same.
-
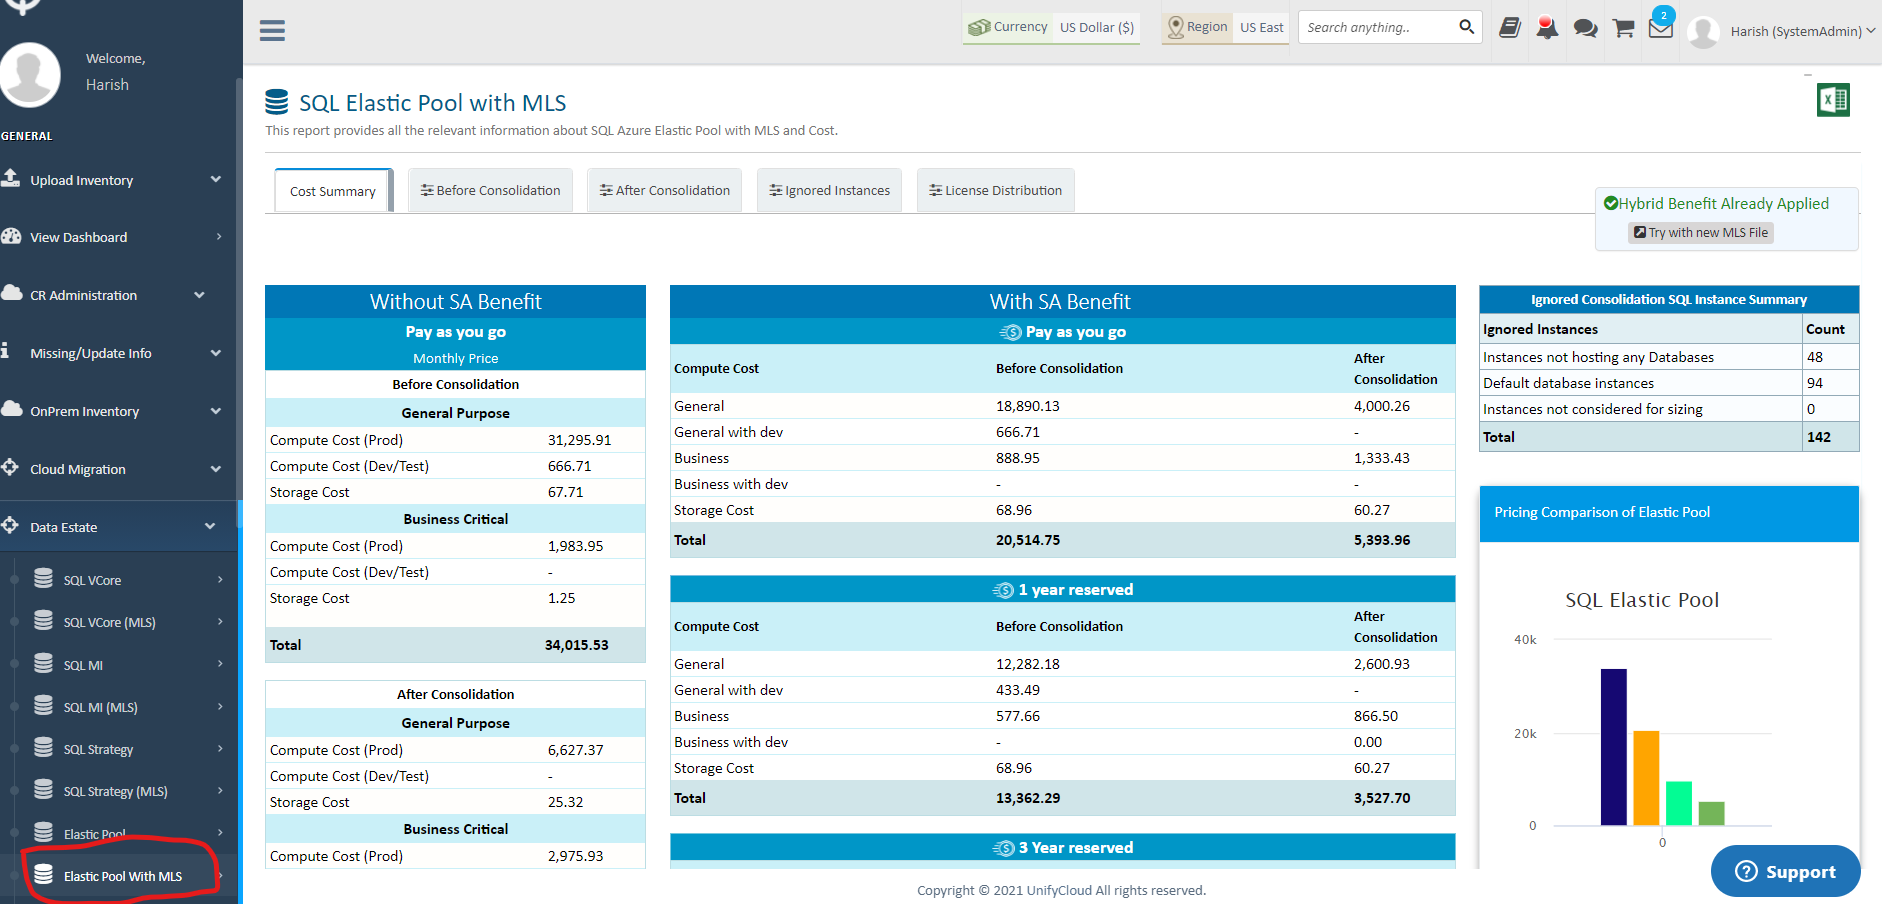
1.3.2 Elastic Pool with MLS
This report provides all the relevant information on SQL Azure Elastic Pool with MLS and Cost analysis.
Use Case: You can upload your Microsoft License File to avail further cost saving on SQL Elastic Pool and get the report on the same. This report is available under “Data Estate” section of your dashboard as “Elastic Pool with MLS” as shown below in Fig 5: Elastic Pool with MLS Report.
-
1.3.1 Elastic Pool Report
-
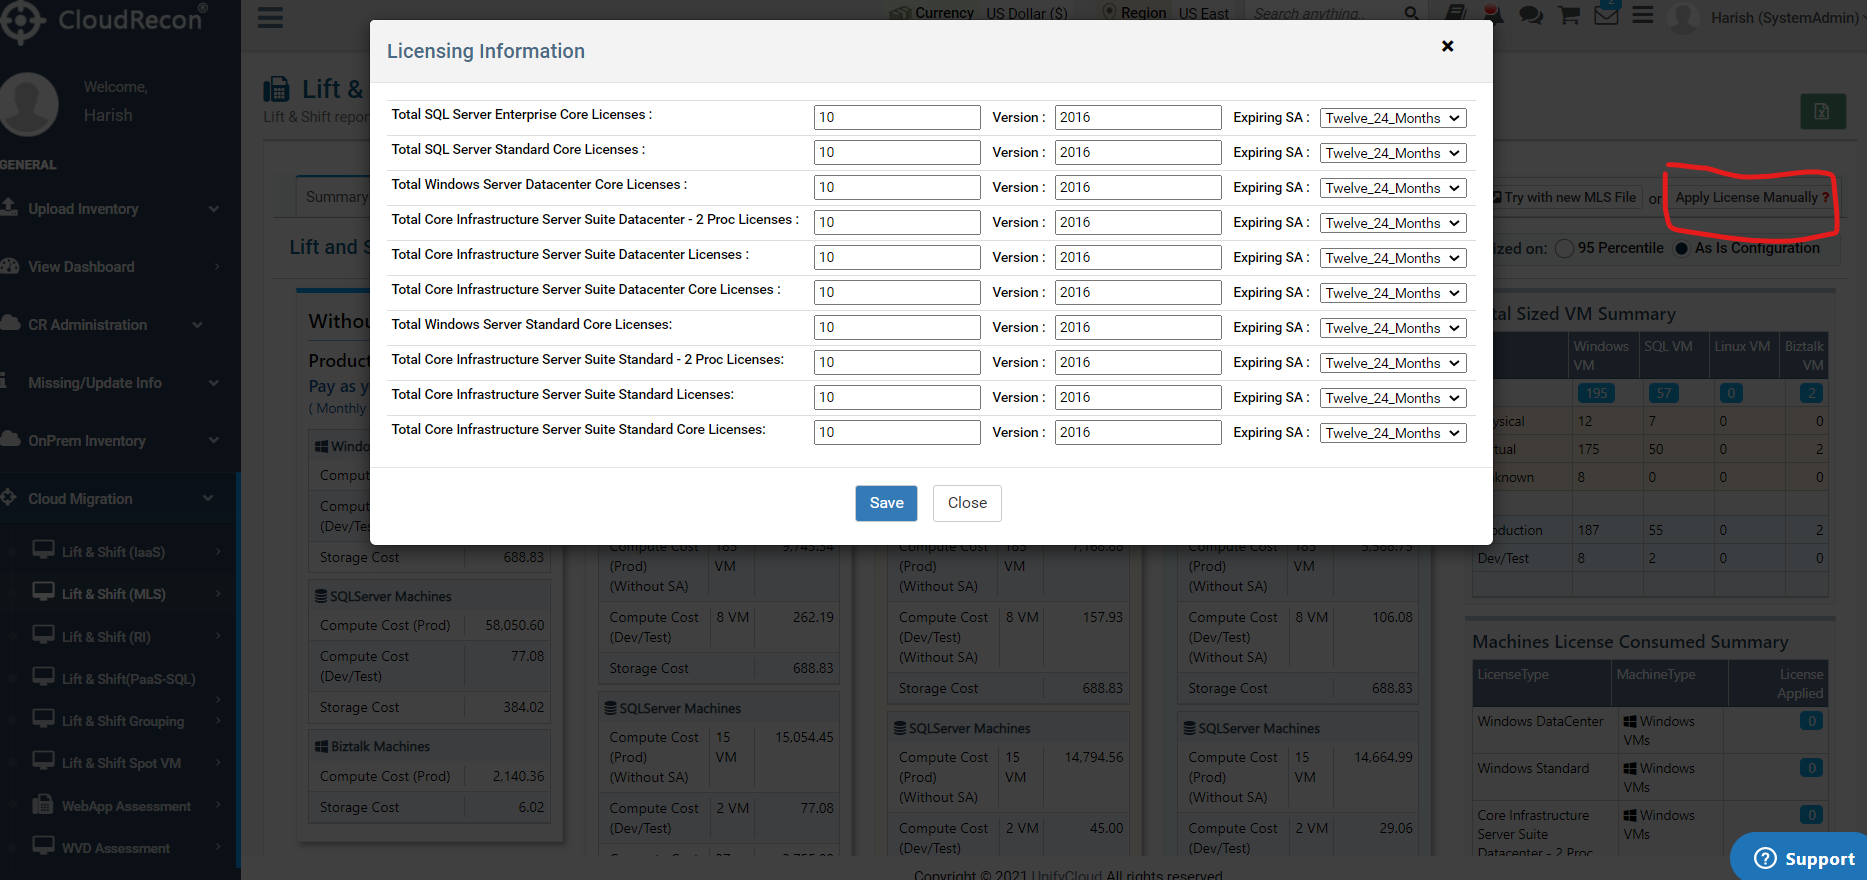
1.4 Lift & Shift (MLS) : Manual License Apply
You can now apply MLS licensing manually with this new feature if MLS file is not available. Click on “Apply License Manually” in the Lift & Shift(MLS) Report to apply manual license details.
Use Case: With this feature you can now use MLS feature even if you do not have an MLS file available. Simply enter the license details and save the information as shown below in Fig 6:Elastic Pool with MLS Report.
-
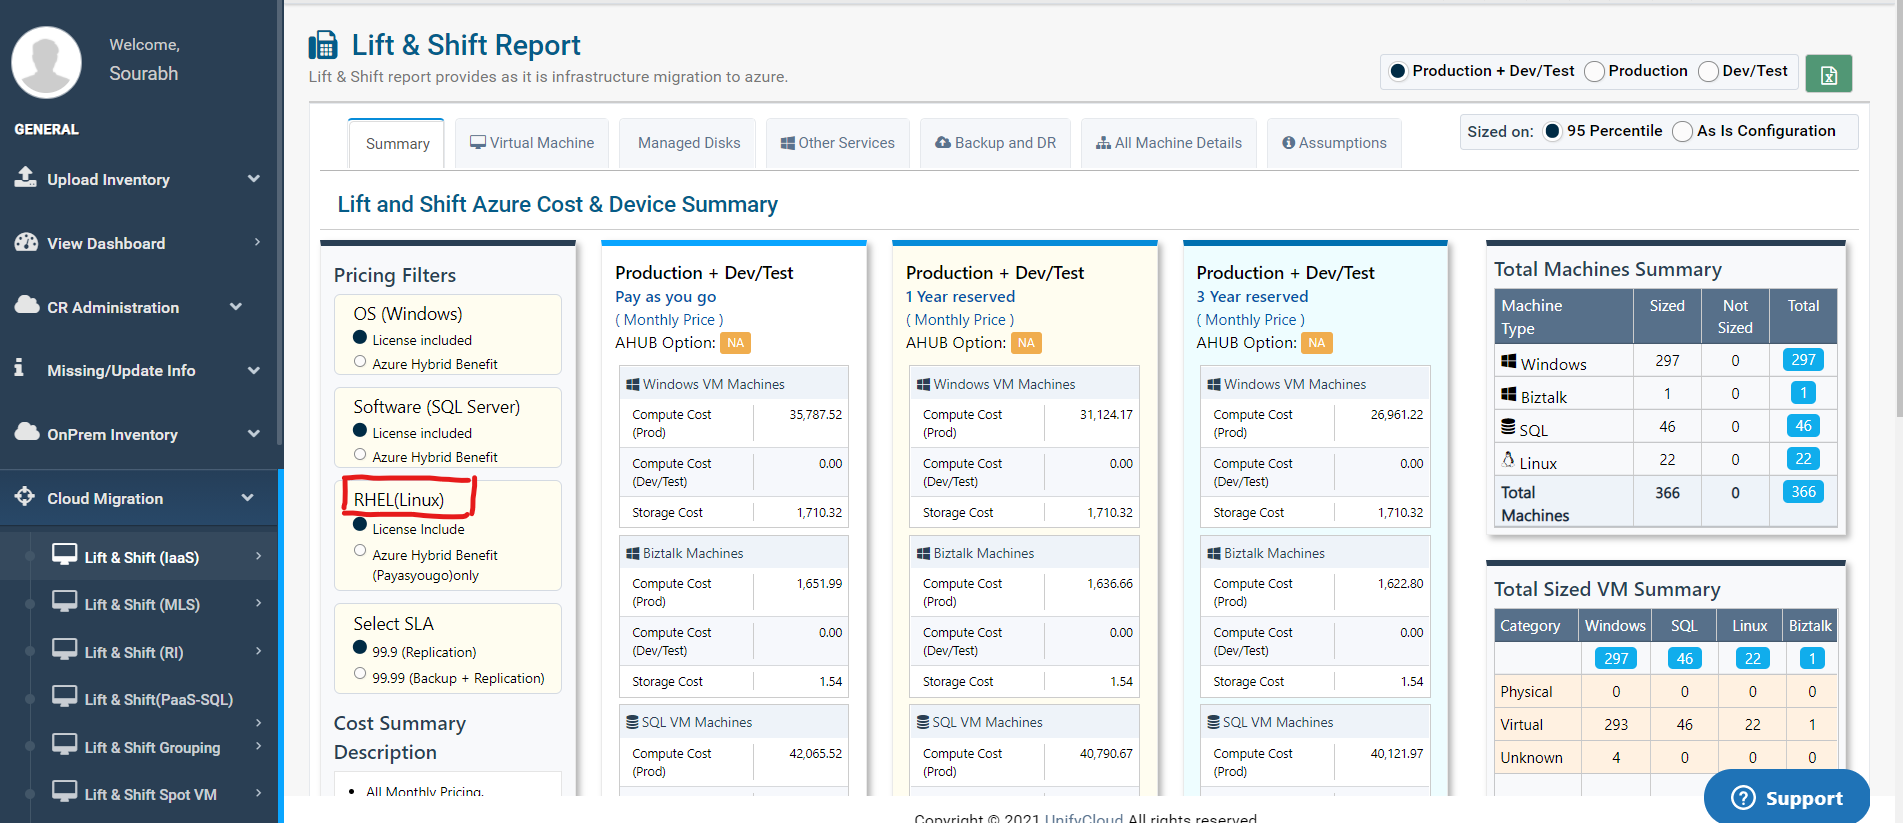
1.5 RHEL(Linux)
RHEL(Linux) benefit option has been included as a new feature in Lift & Shift Report. You can leverage the benefits of this option under the Lift & Shift(IaaS) and Lift & Shift(PaaS-SQL) report.
Use Case: You can now select the options to either include License or Apply Hybrid Benefit(Pay as You Go) for further cost savings. The same impact will be reflected in the final TCO report generated.
• Step1: Select the RHEL(Linux) option under “Pricing Filter” in Lift & Shift(IaaS) report as shown below in Fig 7.
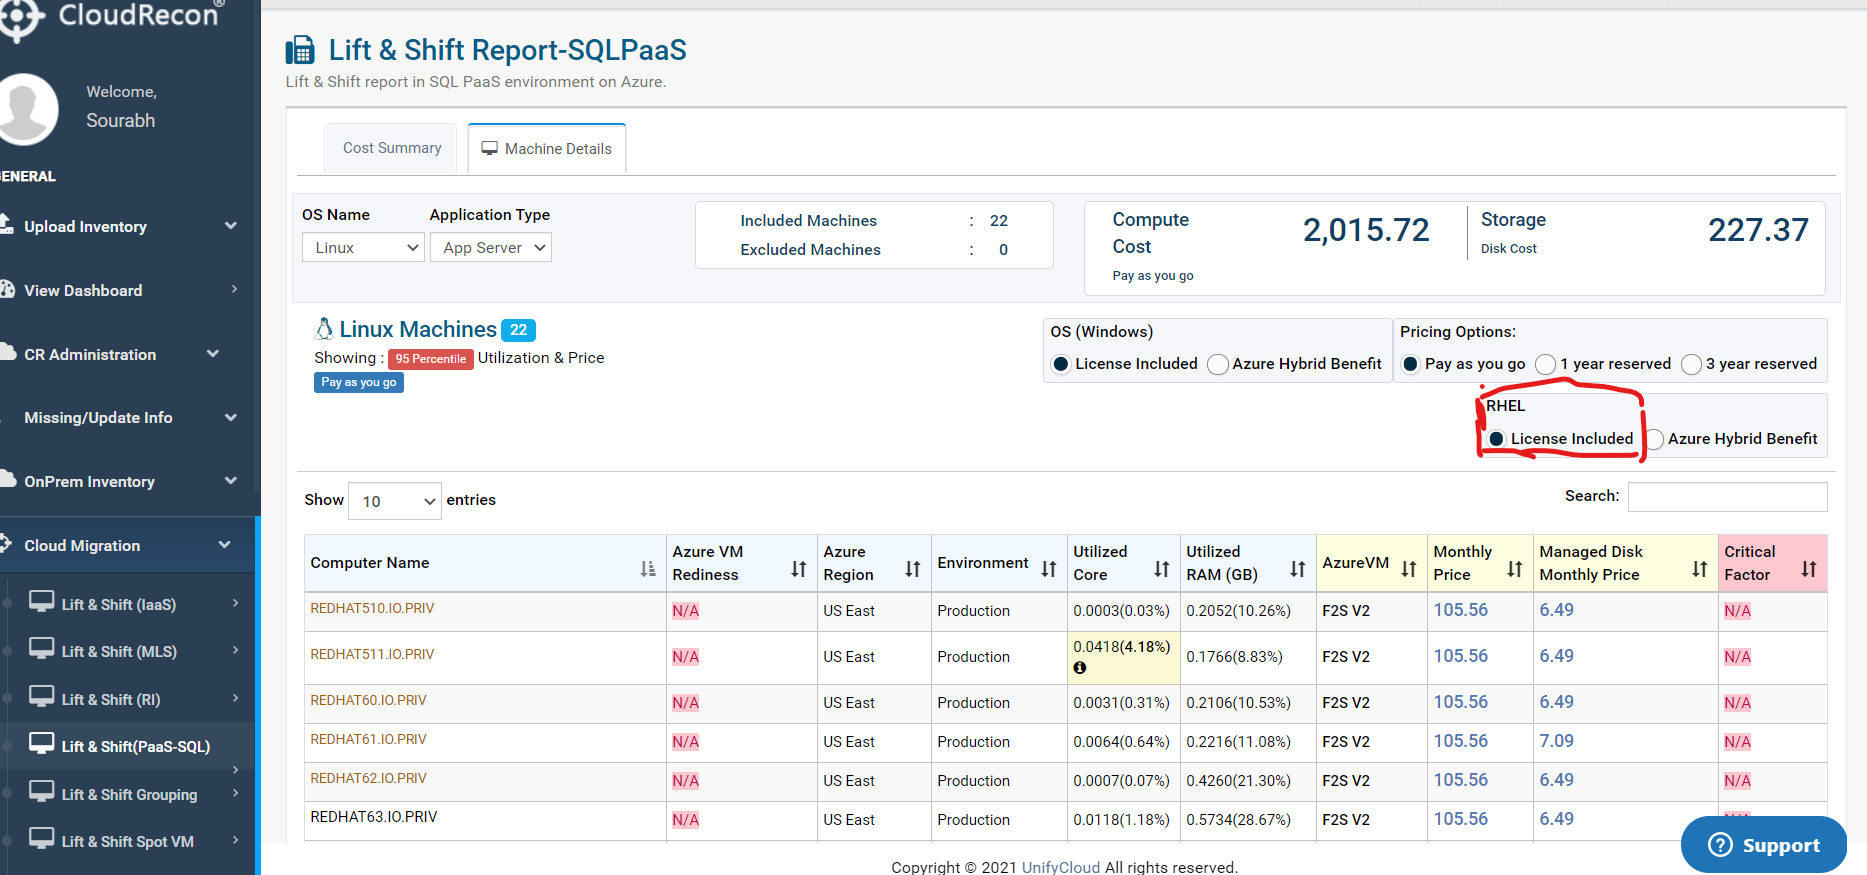
• Step 2: You can select RHEL License option from “Machine Details” under Lift & Shift PaaS-SQL report as shown below in Fig 8.
-
1.1 Upload Block64 Template
-
2. FEATURE UPDATES
-
2.1 Managed Disk Details
The Lift & Shift report earlier recommended only one consolidated Managed Disk for every VM being sized. Now we are using different individual Managed disks to size the VMS and the details for the same are being displayed under the “Managed Disks” section in the Lift & Shift report.
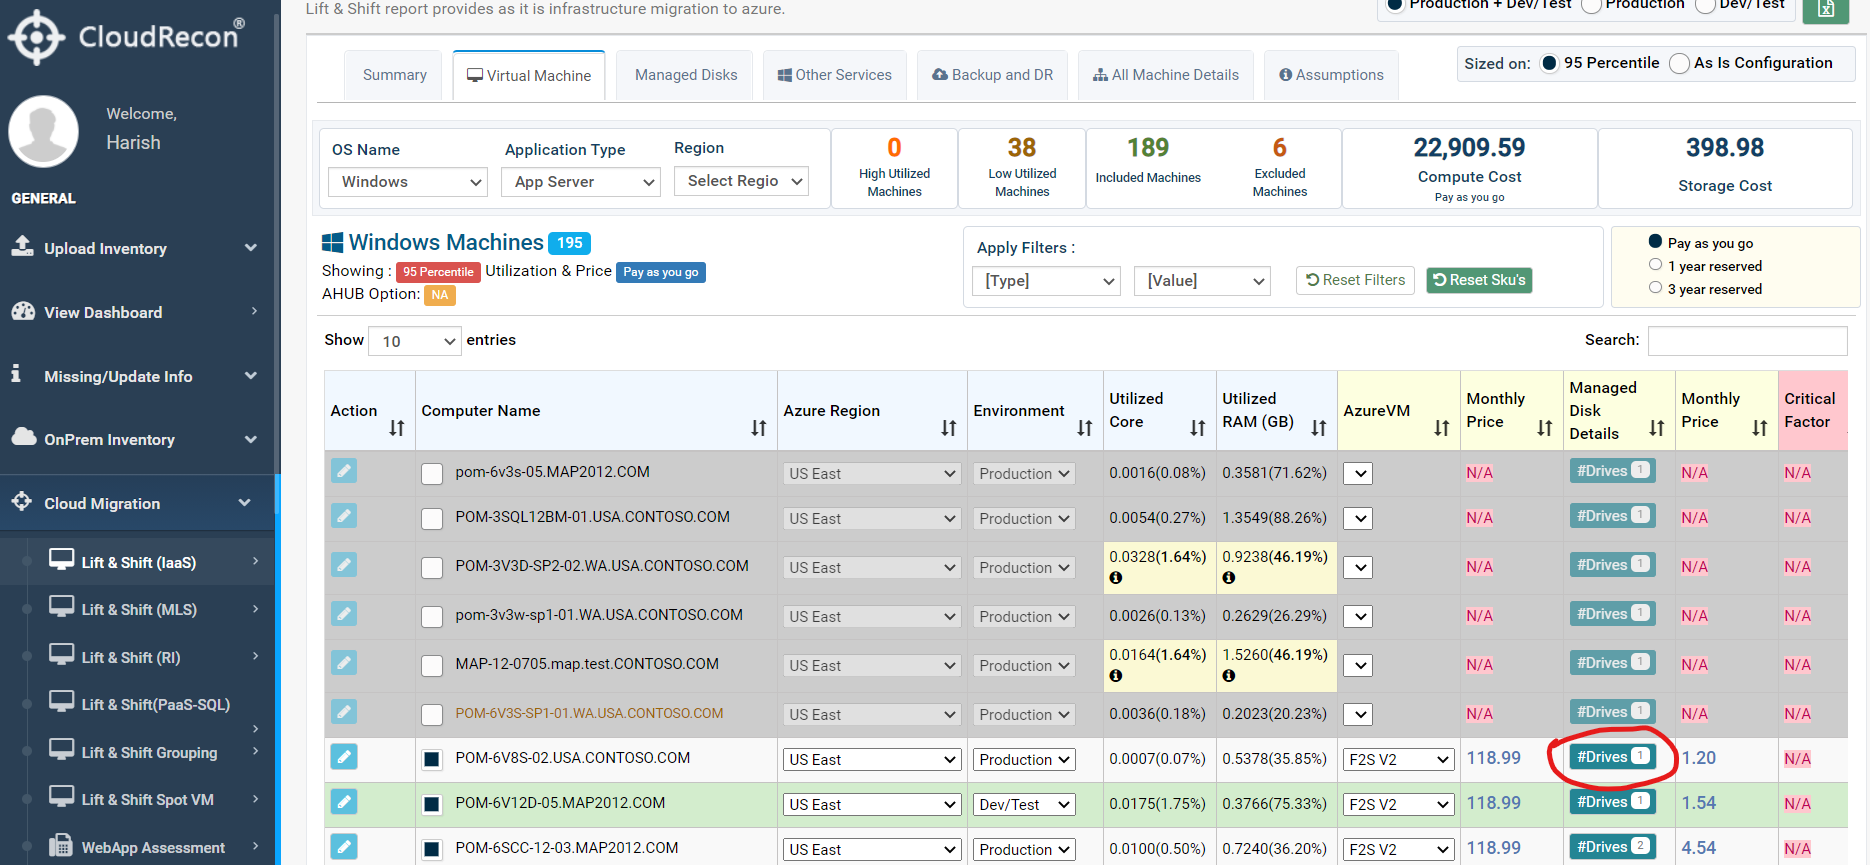
Click on the “#Drives” option and you will be able to see the Managed Disk Drives under that VM as displayed below in Fig 8: Drive Details.
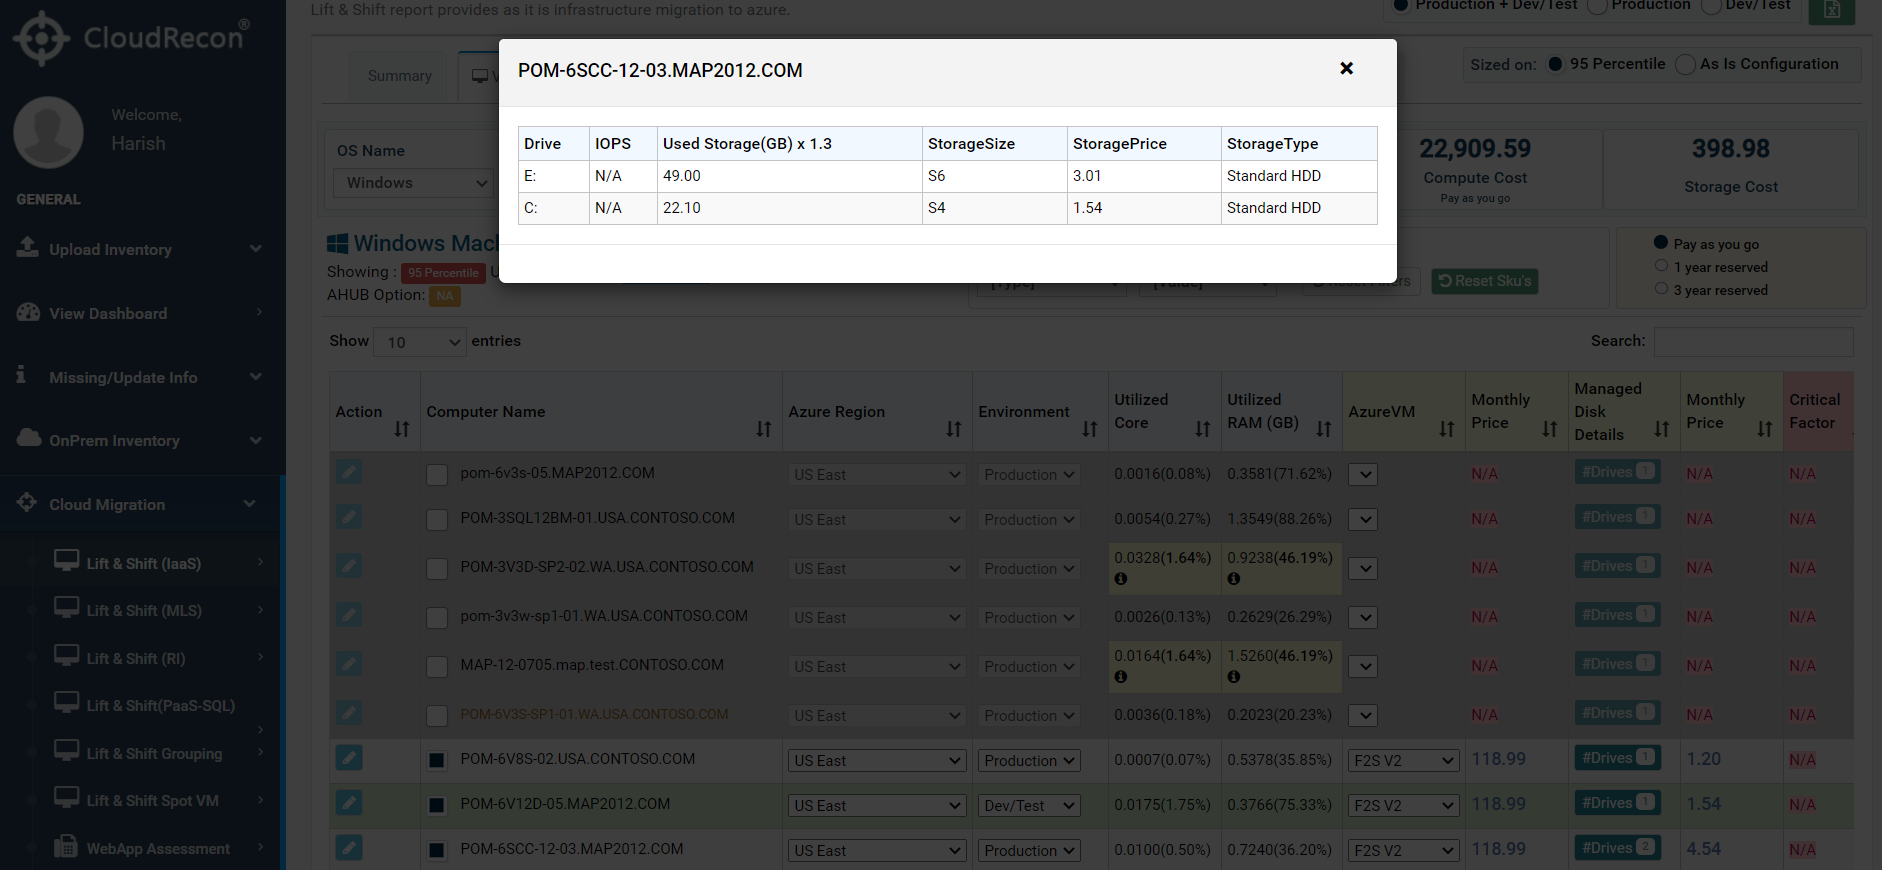
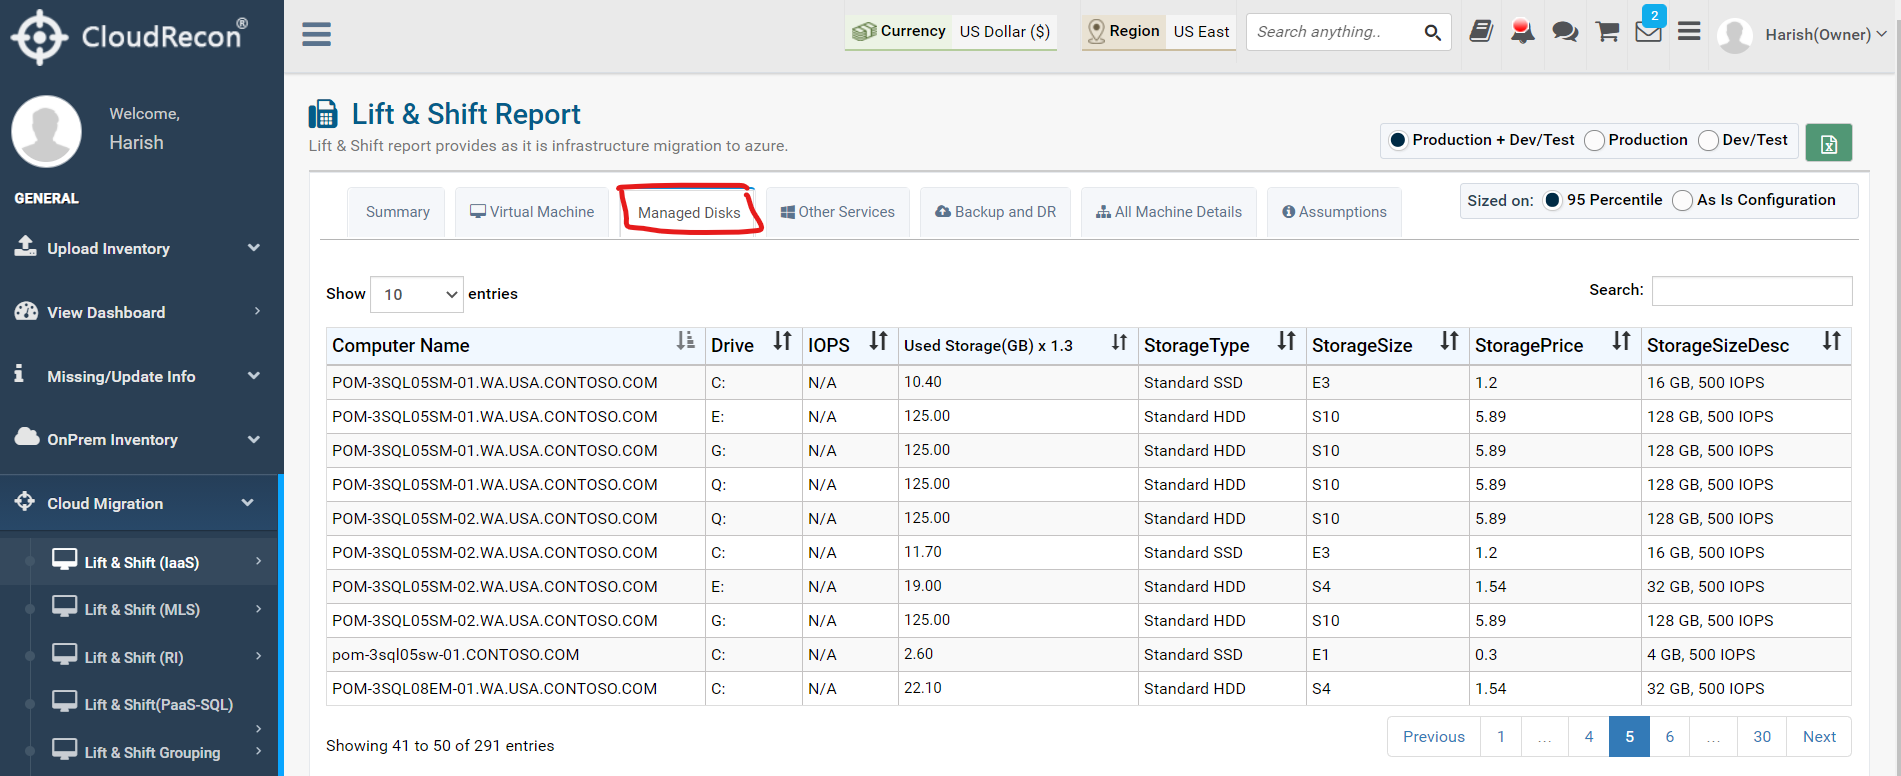
Go to “Managed Disks” section on the report to get details on the Managed Disks.
-
2.2 IOPS
IOPS for every managed disk is now being considering as N/A if no information is found on IOPS instead of conserving a “0” value for the same. Same has been shown below in Fig 10:IOPS value.

-
2.1 Managed Disk Details